


Hello! Welcome to Djalali Cooks. I am really excited to share today’s recipe with you. Panna Cotta is one of those desserts that whenever I see it on a menu at a restaurant, I always order it. It’s light and refreshing, and it always seems fancy, even when it’s presented simply. Well, I finally decided to give it a try, and it turned out to be one of the easiest desserts I have ever made! It’s perfect for a cookout or barbecue because you can present it simply in a glass or plastic cup and have individual portions all ready to serve, covered in the fridge. Let’s get right to the recipe!
What You’ll Find in Today’s Post
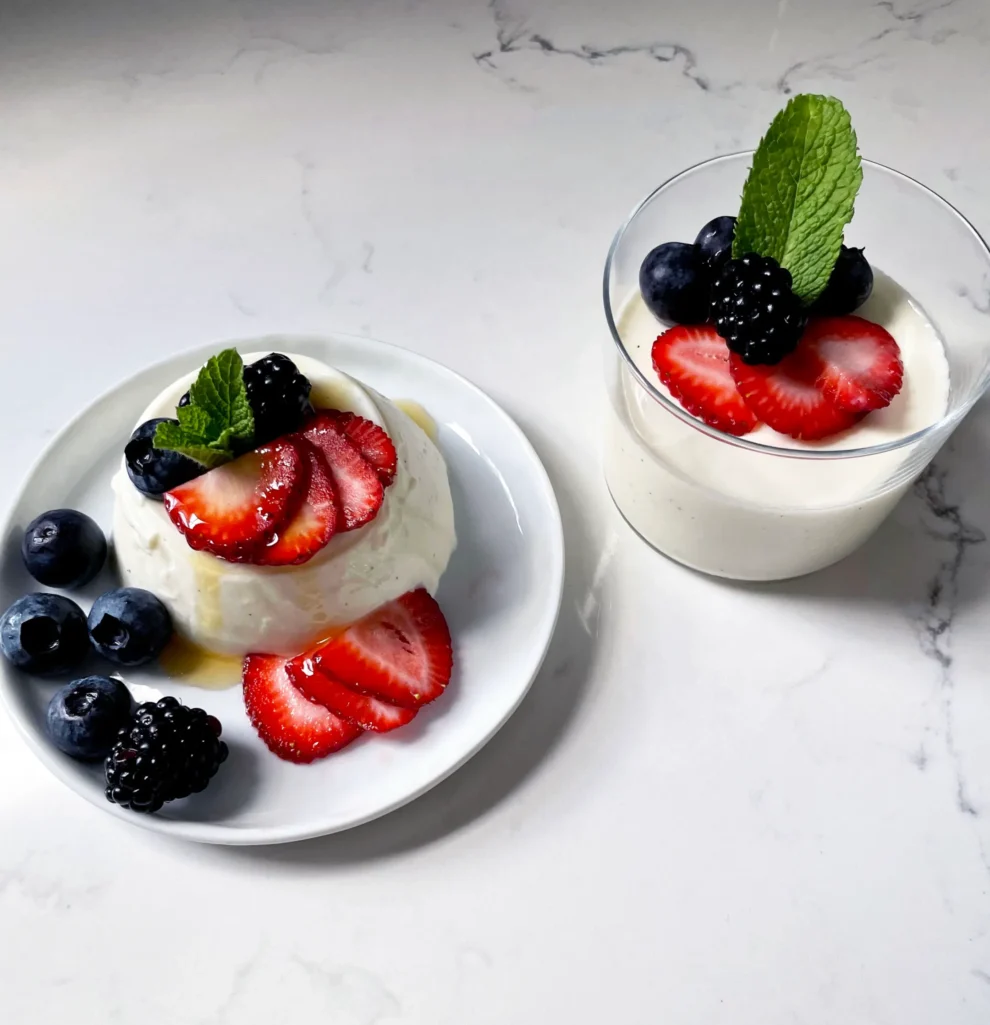
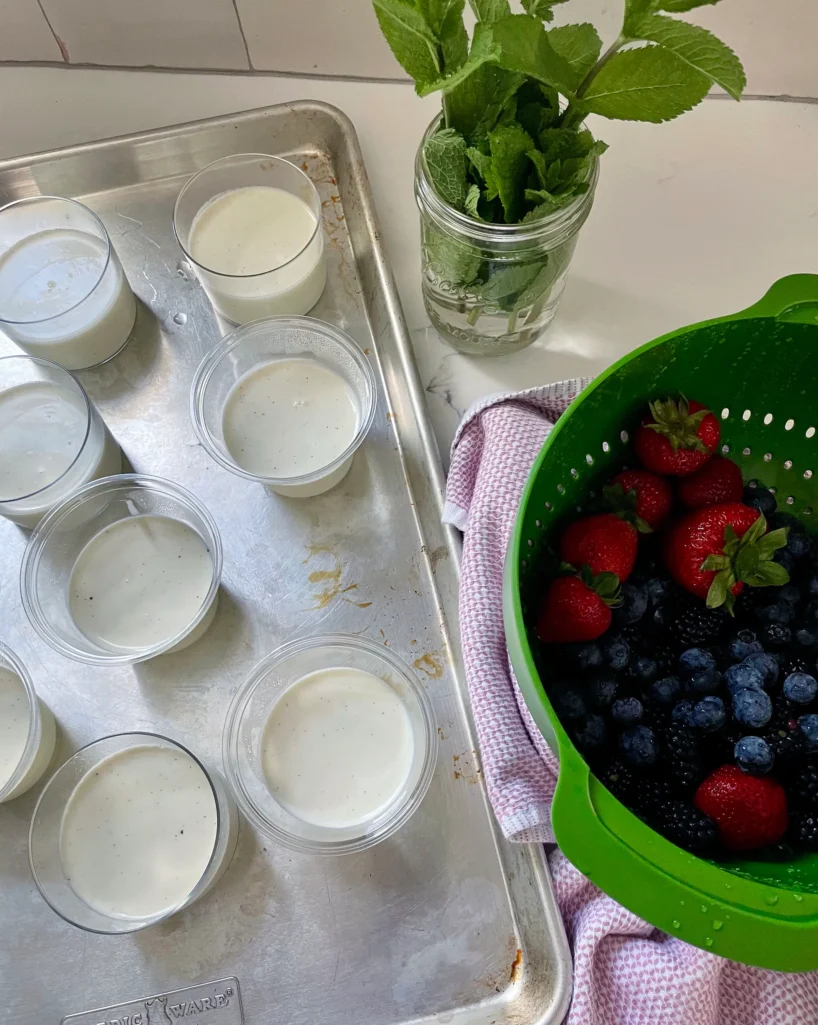
I did these Buttermilk-Vanilla Panna Cottas in two ways: making 8 servings, I did four in 5-ounce, clear, plastic Solo cups, and I did the other four in 5-ounce glasses. Depending on your get-together, you can serve them in the glasses, in the plastic cups, or you can unmold them and present them on small plates. So versatile – and gorgeous no matter which way you decide to serve them.
Buttermilk-Vanilla Panna Cotta Ingredients
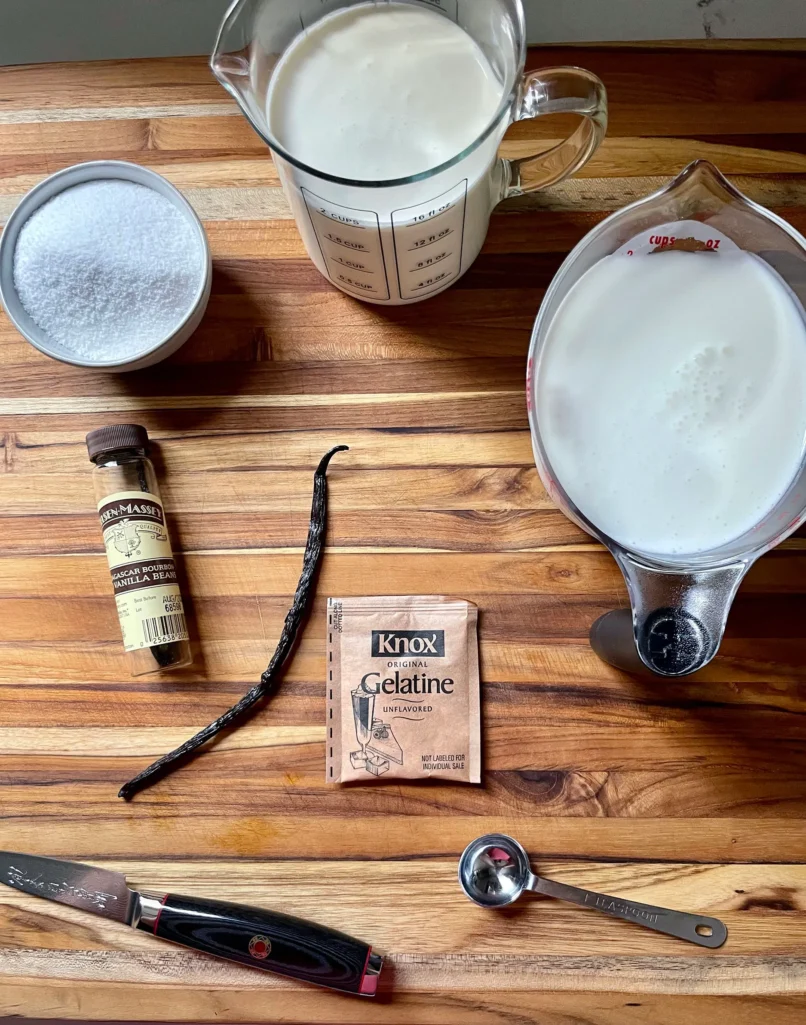
Heavy cream is the base for silky, smooth Panna Cotta. It’s like a custard but without the eggs, so it feels lighter than a custard. Unflavored, powdered gelatin sets up our little Panna Cottas, and we are flavoring with a vanilla bean, sugar, and buttermilk.
- 1/2 cup Sugar
- 2 tsp. Unflavored Gelatin
- Pinch Kosher Salt
- 2 cups Heavy Cream
- 1 Vanilla Bean
- 2 cups Buttermilk
- Honey
- Fresh Berries (Strawberries, blueberries, and Blackberries)
Buttermilk-Vanilla Panna Cotta Instructions
Step 1
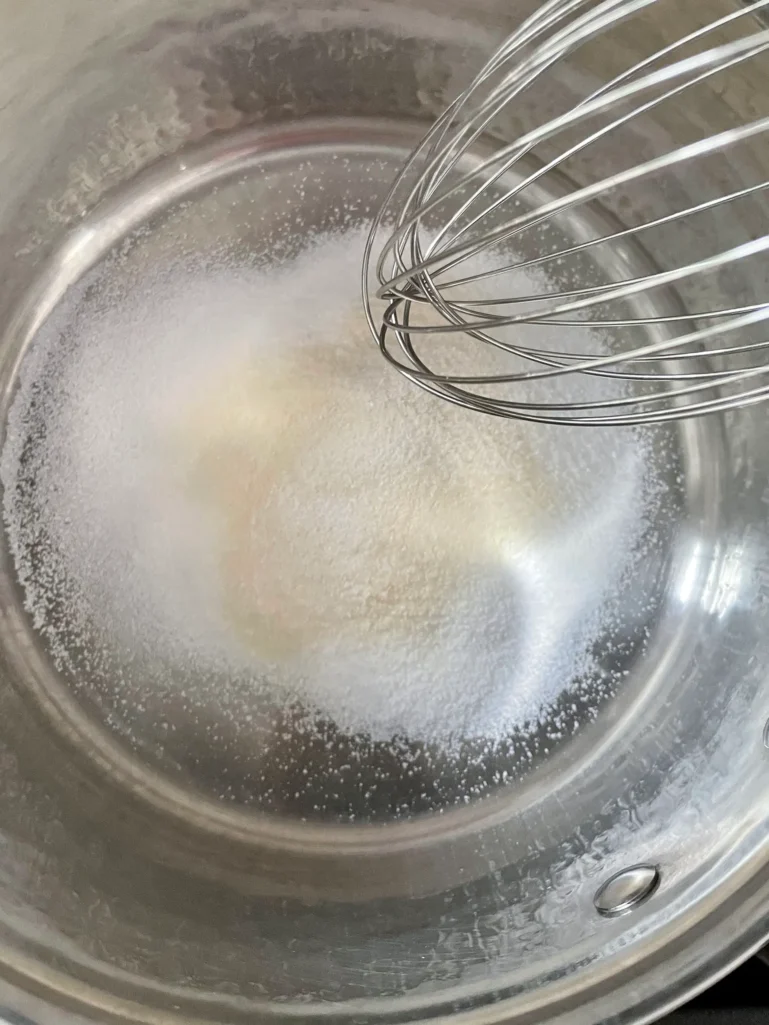
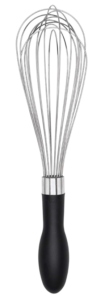
In a medium saucepan, whisk together the sugar, gelatin, and salt until very well combined.
Step 2
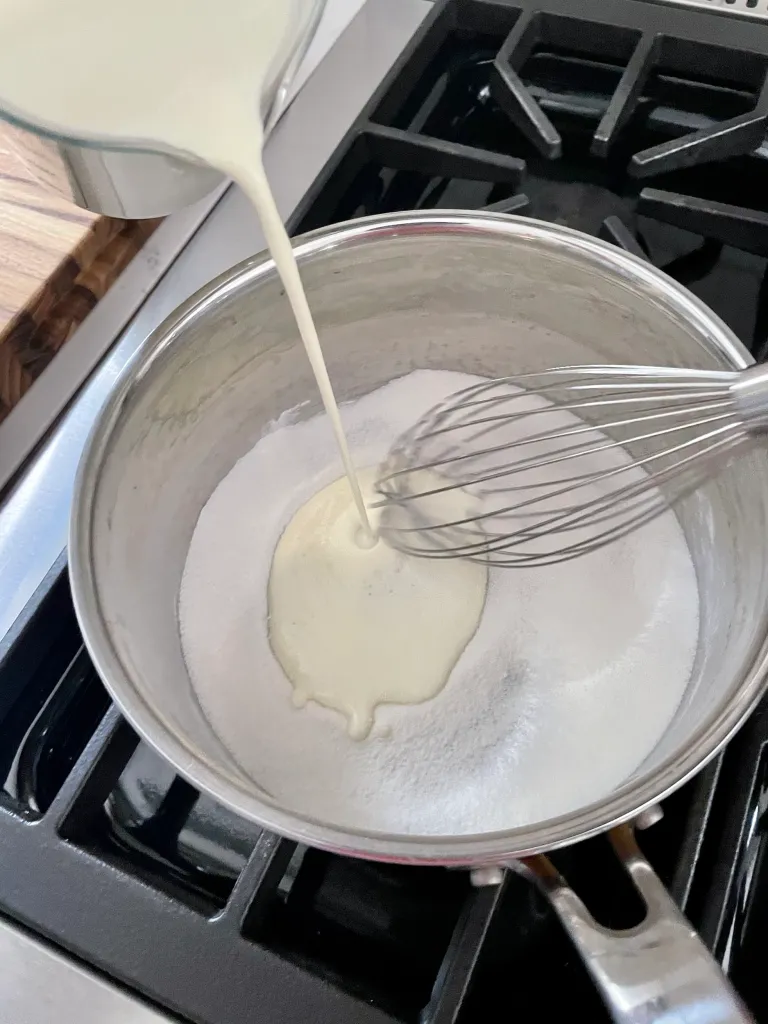
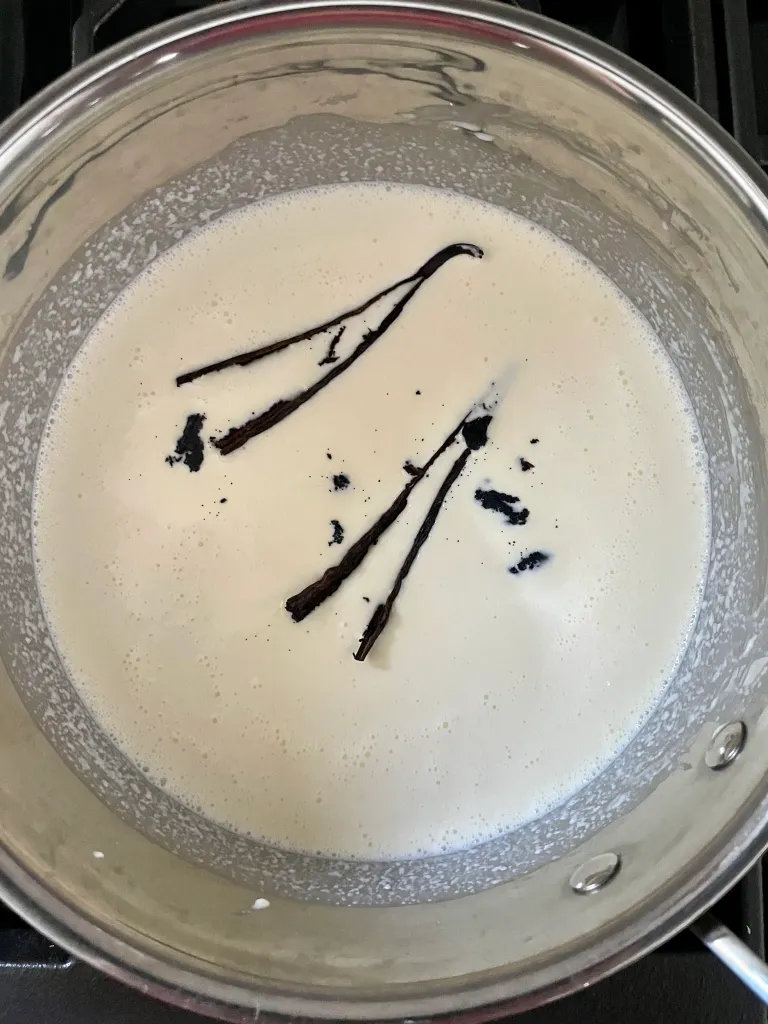
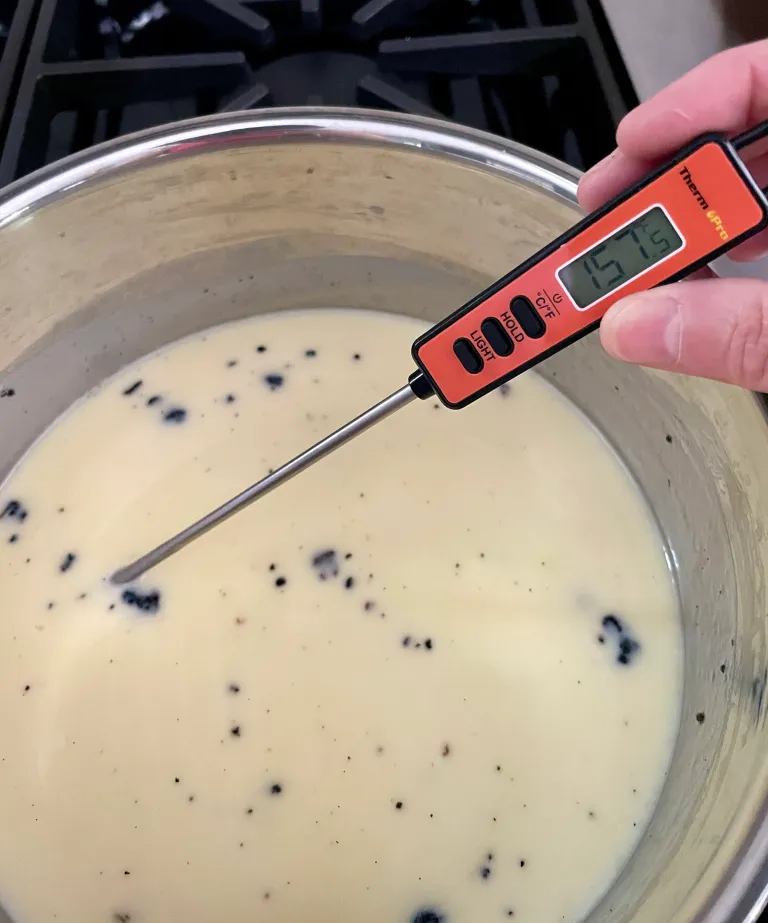
Pour in the cream and let the mixture sit for 5 minutes. Meanwhile, cut the vanilla bean in half lengthwise and scrape out the seeds with the tip of a paring knife. Add the vanilla bean and the vanilla seeds to the cream mixture and heat over medium heat, stirring occasionally, until the mixture hits 150-160 degrees (about 5 minutes).
Step 3
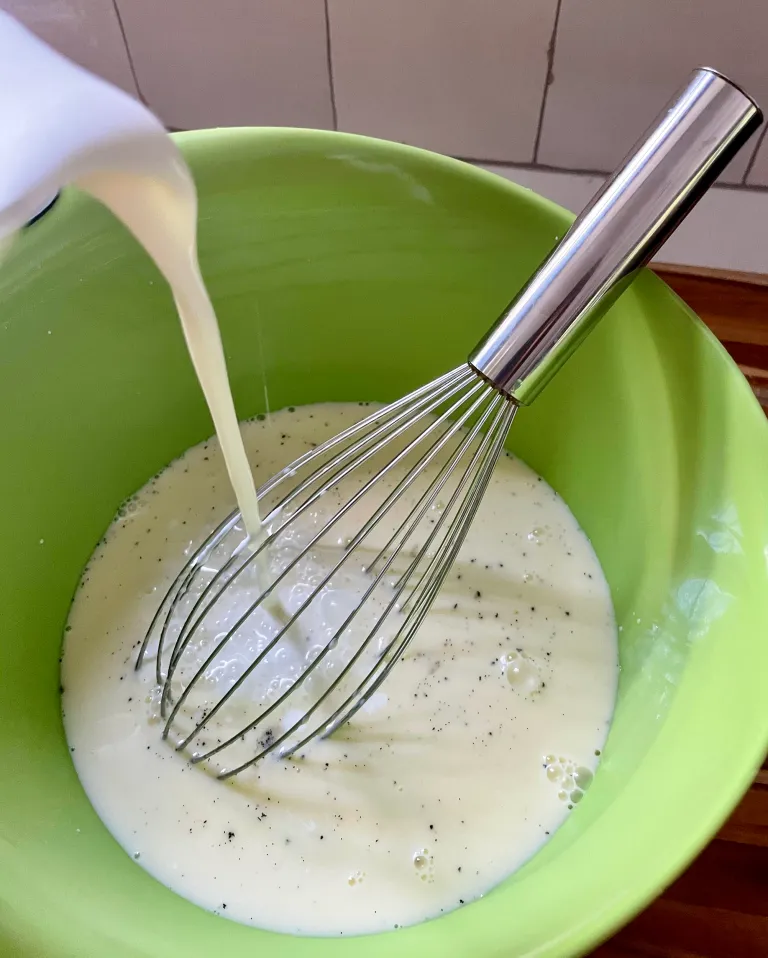
Remove the cream mixture from the heat and let it cool until the mixture registers 105-110 degrees (about 15 minutes). Then strain the cream mixture through a fine mesh strainer. Discard the remaining vanilla bean. Gently whisk in the buttermilk. Cooling the mixture before adding the buttermilk will keep the buttermilk from curdling.
Step 4
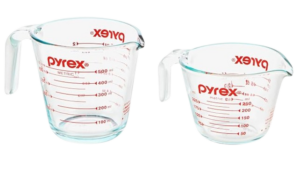
It helps to have the Panna Cotta mixture in a bowl with a pour spout; If you don’t have a batter bowl, transfer the mixture to a large measuring cup to make portioning in ramekins or cups easier. Then, divide the mixture evenly between eight, 5-6 ounce glasses, ramekins, or jars.
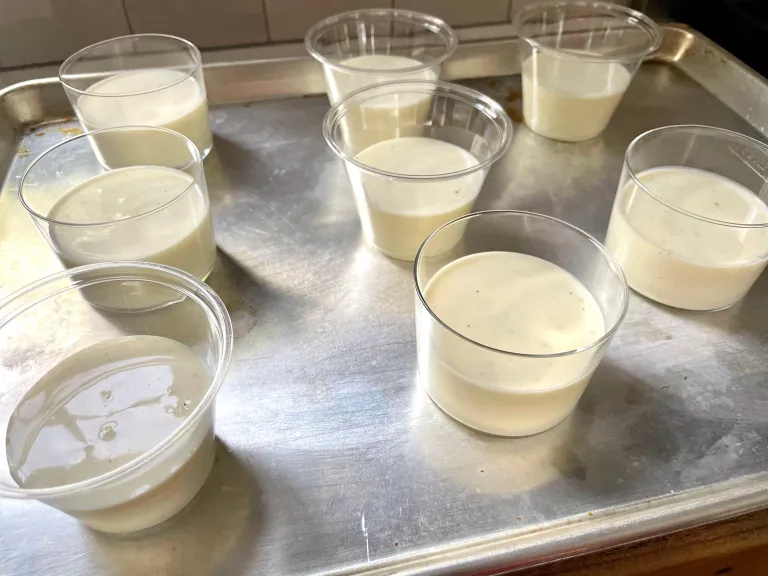
These portions of Panna Cotta will be refrigerated for at least 6 hours. If you plan to make these ahead and they will be in the fridge for longer than 6 hours, individually cover each cup with plastic wrap to avoid a skin forming on the tops of the Panna Cottas. If you plan to serve them the same day, cover the sheet tray with a second, inverted sheet tray, or one large sheet of plastic wrap.
Serving the Buttermilk-Vanilla Panna Cotta
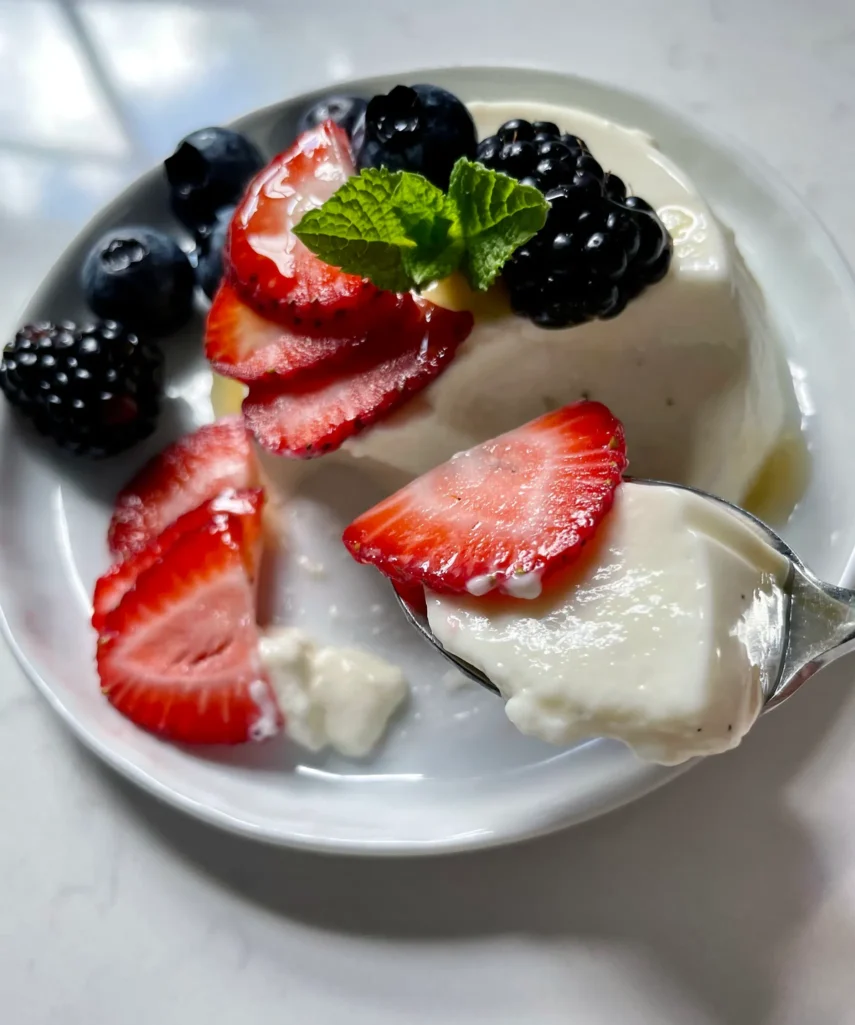
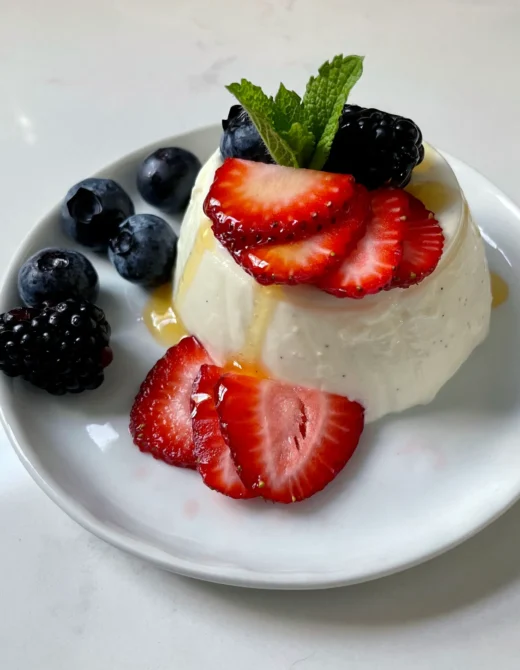
I let these sit in the fridge overnight. The next day, they were set up beautifully. I used a paring knife to gently unmold one of the Panna Cottas in a plastic Solo cup. It took two go-arounds with my knife, and I placed a small, cold plate, inverted over the top of the cup, then flipped the whole thing over so the cup was upside down on the plate. With a little jiggle of the cup, the Panna Cotta slid right out onto the cold plate.
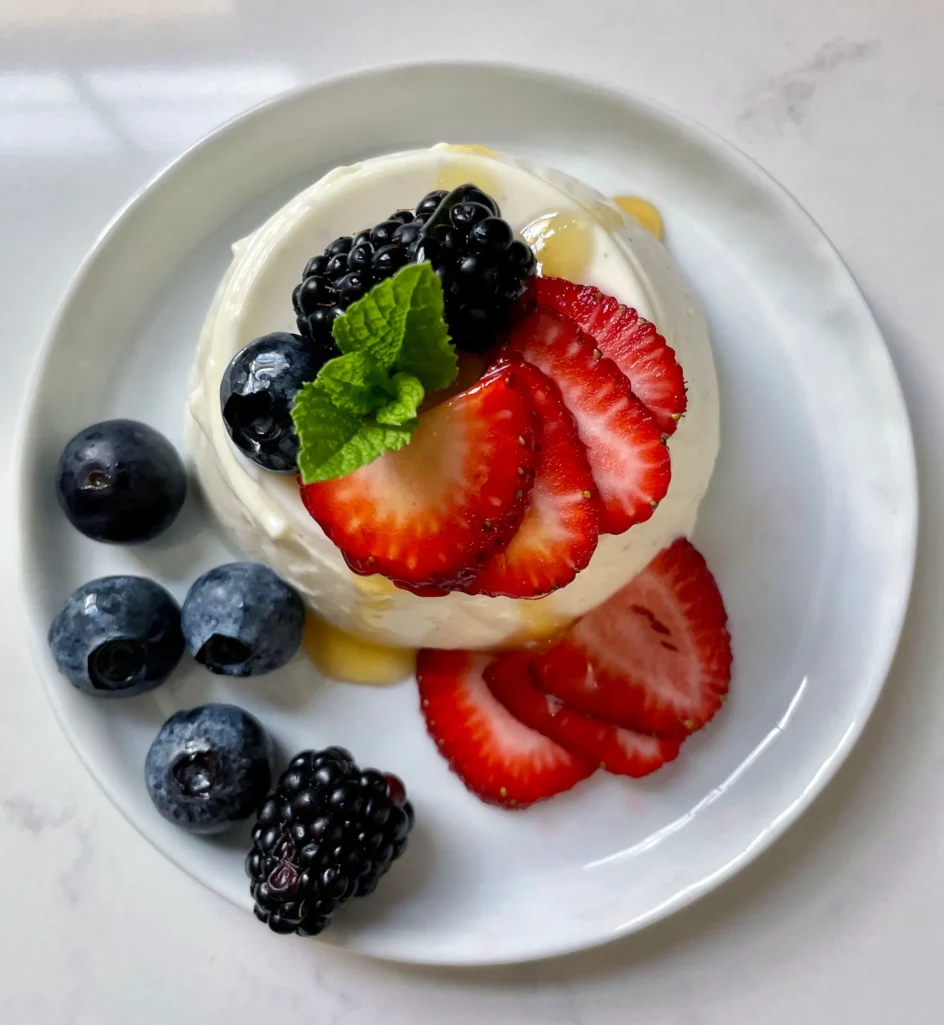
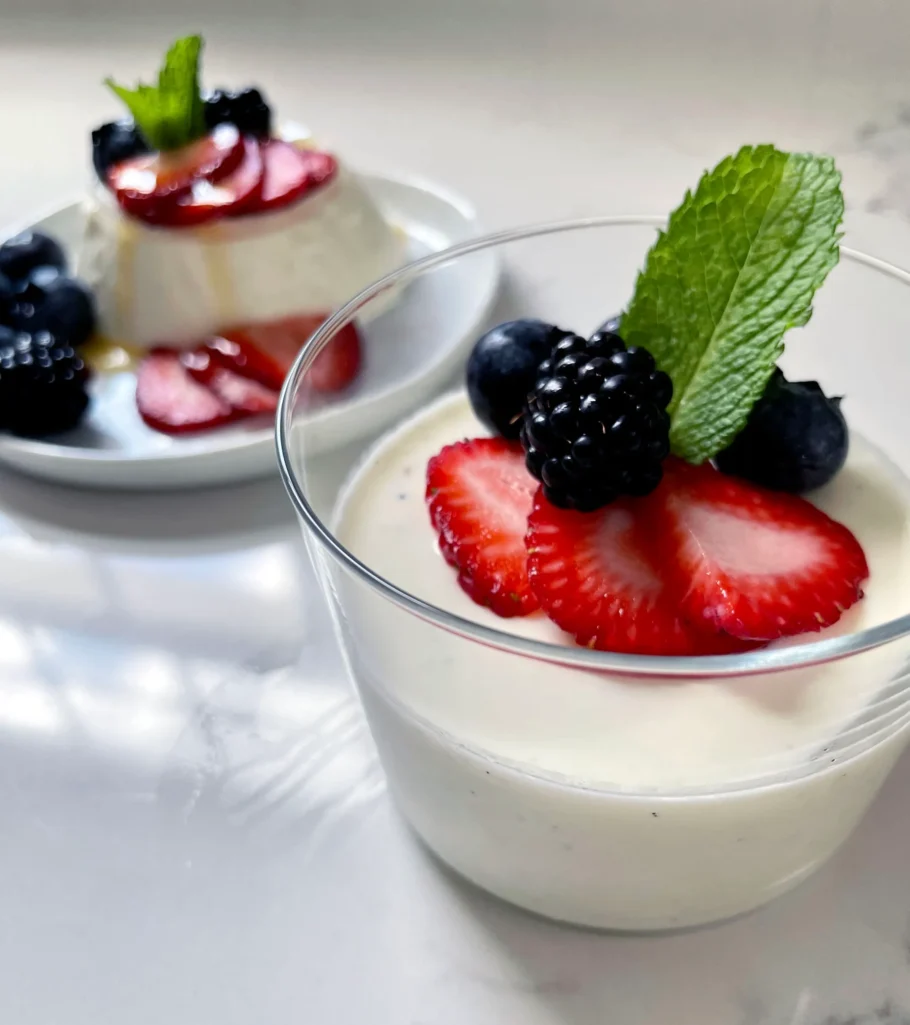
The top did have the SOLO cup logo imprinted on it, but since we are topping these with fresh berries, mint, and a drizzle of honey, the logo was not visible in the end, still a lovely presentation. While I like this inverted presentation, I really like how they eat when served directly in the cup. Molding the Panna Cotta in tiny mason jars would be a super-cute way to present the Buttermilk-Vanilla Panna Cotta, and even better because they have lids! If you make these ahead, just wait to top with berries and honey until the day of service.
Top these with your favorite summer berries. I like the red, white, and blue color scheme for the summer holidays. The tangy, rich flavor of the buttermilk really shines, and the vanilla is fragrant and flavorful. Thanks to the buttermilk, these are not very sweet. So that drizzle of honey is a wonderful way to sweeten it up a bit. But you can leave it off if you like, because the berries bring their own fresh, sweet flavors too.
I hope you give the Buttermilk-Vanilla Panna Cotta a try: they are really easy, they’re pre-portioned, you can make them a couple of days ahead of time, and they are so pretty! Remember to Pin this recipe, it’s great all year, and you can really make it your own with toppings and flavors. Take care and be well, everyone, xo Kelly
Be sure to check out some of my favorite dessert recipes:
FAQS – Buttermilk Vanilla Panna Cotta
Panna cotta is a classic Italian dessert made from sweetened cream set with gelatin. The name literally means “cooked cream.” It’s silky, light, and delicate — think of it as a custard without the eggs. It’s elegant enough for a dinner party but simple enough for a weeknight treat.
Buttermilk gives these panna cottas a lovely tangy flavor that keeps them from being overly sweet and heavy. It also makes the texture feel lighter and more refreshing than a traditional all-cream version. The tang pairs beautifully with the honey and fresh berries.
Not at all! You can serve them right in the glass, cup, or jar you set them in — just top with berries and honey and you’re done. Unmolding is a fun option for a more elegant presentation, but the in-glass version is just as delicious and even easier to serve at a party.
Yes — this is one of the best things about panna cotta! You can make them up to 3 days ahead. Just cover each cup individually with plastic wrap if chilling for more than 6 hours to prevent a skin from forming on top. Wait to add the berries and honey until right before serving.
If you add buttermilk to a hot liquid, it will curdle. Letting the cream mixture cool to around 105–110°F before whisking in the buttermilk keeps everything smooth and silky.
Yes! If you don’t have a vanilla bean, substitute 1 teaspoon of pure vanilla extract. Stir it in along with the buttermilk after the cream has cooled. You won’t get quite the same flecks of vanilla seeds, but the flavor will still be wonderful.
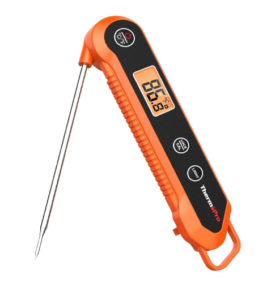
Key Equipment

Buttermilk-Vanilla Panna Cotta Recipe Card
Buttermilk-Vanilla Panna Cotta with Berries and Honey
Ingredients:
- 1/2 cup Sugar
- 2 tsp. Unflavored Gelatin
- Pinch Kosher Salt
- 2 cups Heavy Cream
- 1 Vanilla Bean
- 2 cups Buttermilk
- Honey
- Fresh Berries Strawberries, blueberries, and Blackberries
Instructions:
- Whisk sugar, gelatin, and salt in a small saucepan until very well combined.
- Whisk in cream and let sit for 5 minutes.
- Cut vanilla bean in half lengthwise. Using the tip of a paring knife, scrape out seeds. Add beans and seeds to the cream mixture.
- Cook over medium heat, stirring occasionally, until mixture registers 150 to 160 degrees, about 5 minutes.
- Remove from heat and let mixture cool to 105 to 110 degrees, about 15 minutes.
- Strain cream mixture through fine-mesh strainer into medium bowl, pressing on the solids to extract as much liquid as possible.
- Discard the remaining solids.
- Gently whisk in buttermilk.
- Set eight 5-ounce ramekins on a rimmed baking sheet. Divide the buttermilk mixture evenly among the ramekins. Invert the second rimmed baking sheet on top of the ramekins and carefully transfer to the refrigerator. Chill for at least 6 hours or up to 3 days (if chilling for more than 6 hours, cover each ramekin with plastic wrap).
- Working with 1 panna cotta at a time, insert a paring knife between the panna cotta and the side of the ramekin. Gently run a knife around the edge of the ramekin to loosen the panna cotta.
- Cover the ramekin with a serving plate and invert the panna cotta onto the plate. (You may need to gently jiggle the ramekin.)
- Drizzle each panna cotta with honey, then top with berries and serve.
Tips/Notes
Did you make this recipe?
We’d love to see! Tag us @styleatacertainage


LEAVE A COMMENT