


Okay friends, let’s get one thing straight—just because we’ve got a few more candles on our birthday cakes doesn’t mean we should shy away from the GLOW. Highlighter isn’t reserved just for 20-somethings on TikTok; in fact, it can be one of the most flattering products for mature skin…when used correctly.
It brings life back to a tired blah complexion, can lift certain facial features, and adds a youthful radiance that no filter can compete with.
Why Highlighter Still Belongs in Your Makeup Bag
As we age, our skin loses its natural luminosity. A well-placed highlighter mimics that youthful glow, giving the skin a subtle, fresh sheen rather than a harsh shimmer. The key to success is: placement, texture, and choosing the right formula. We do not have to mimic the blinding disco ball look from the Studio 54 days!
And before we get into this makeup tutorial, have you read my article from last week posing the question, “Would You Go Makeup Free Like Pamela Anderson?” I was THRILLED with the amount of you that chose to take time to comment on this subject! Y’all have no idea how much the interaction on these posts I write means to me. So thank you 🙂 And if you want an uber no-makeup makeup look, be sure to check it out on the post.
Now let’s get into what the Best Highlighters for Mature Skin are…
My glow-getter picks that give light, without the glitter:

Charlotte Tilbury Beauty Light Wand “Spotlight” one of my fave shades in the line, $42. This is a multi-use illuminating gel that can be worn as a highlighter or blush for buildable color and an instant glow. Dot and blend for easy application with your finger or brush. Also looks great used BEFORE foundation for a much more subtle glow.
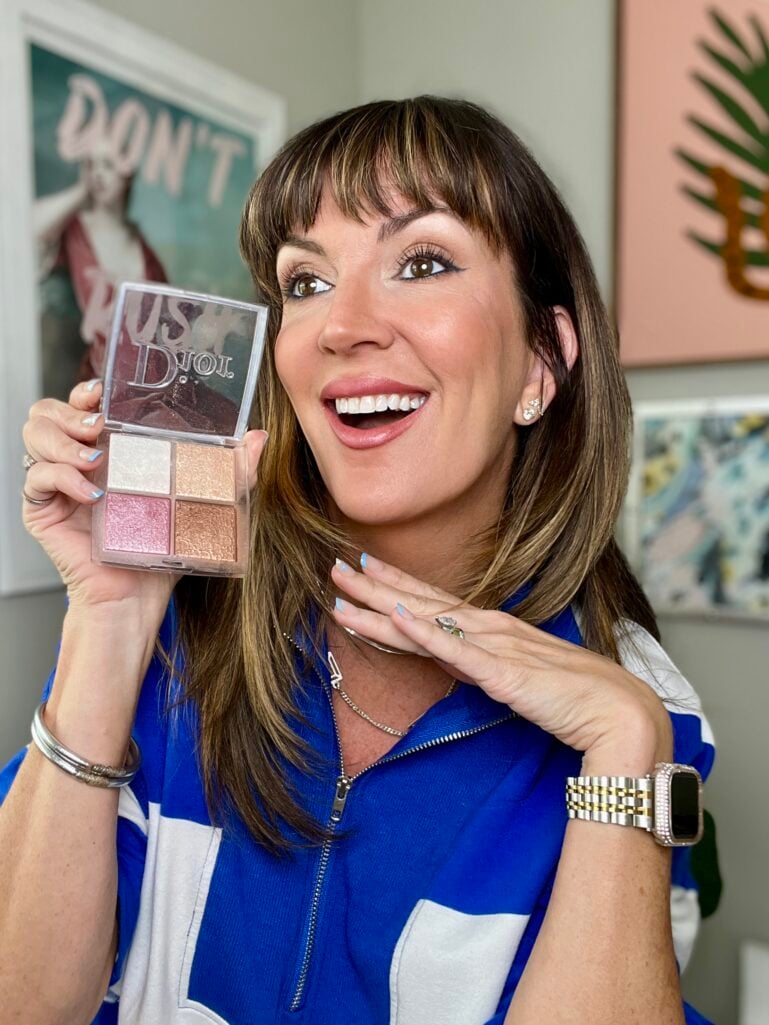
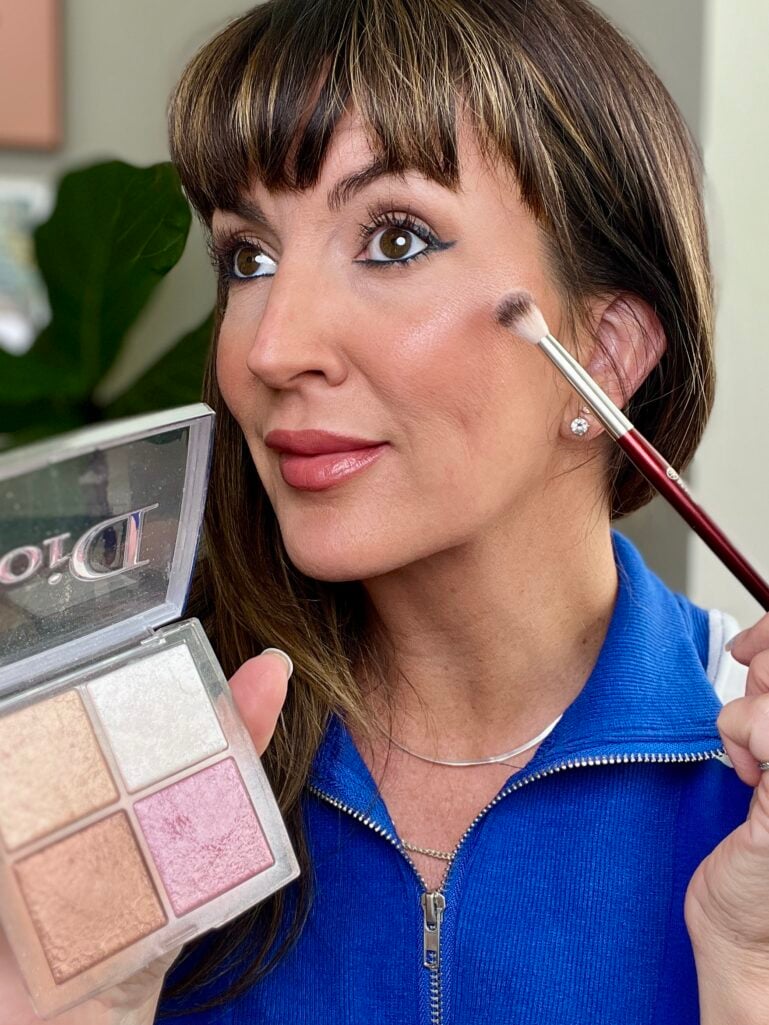
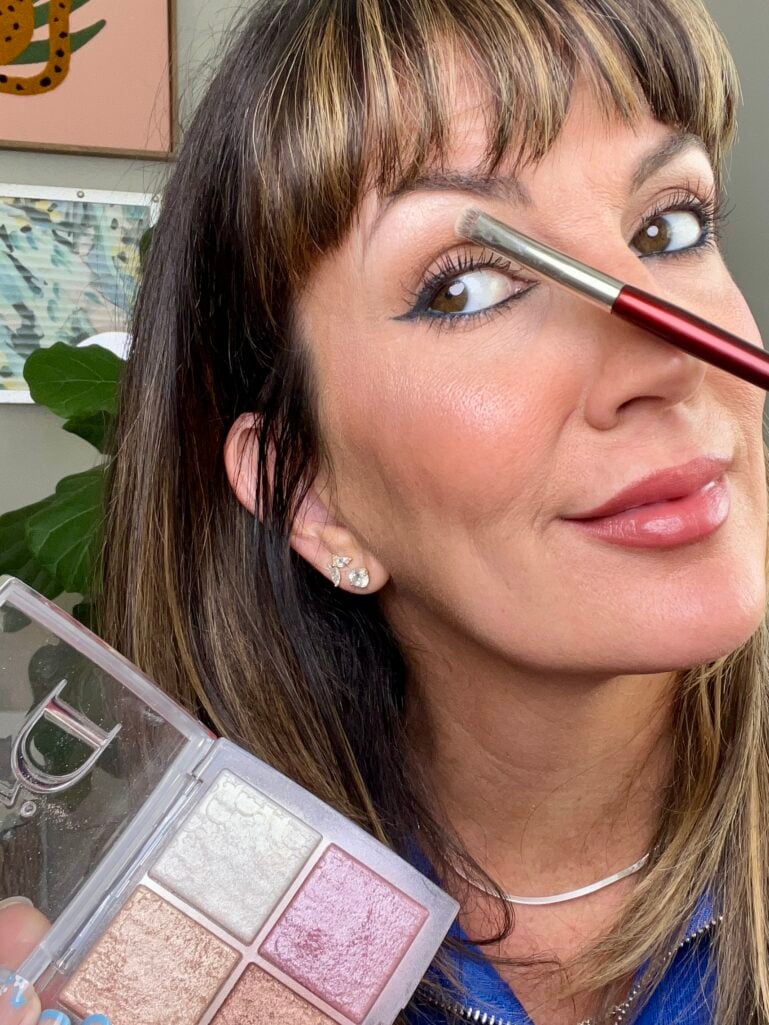
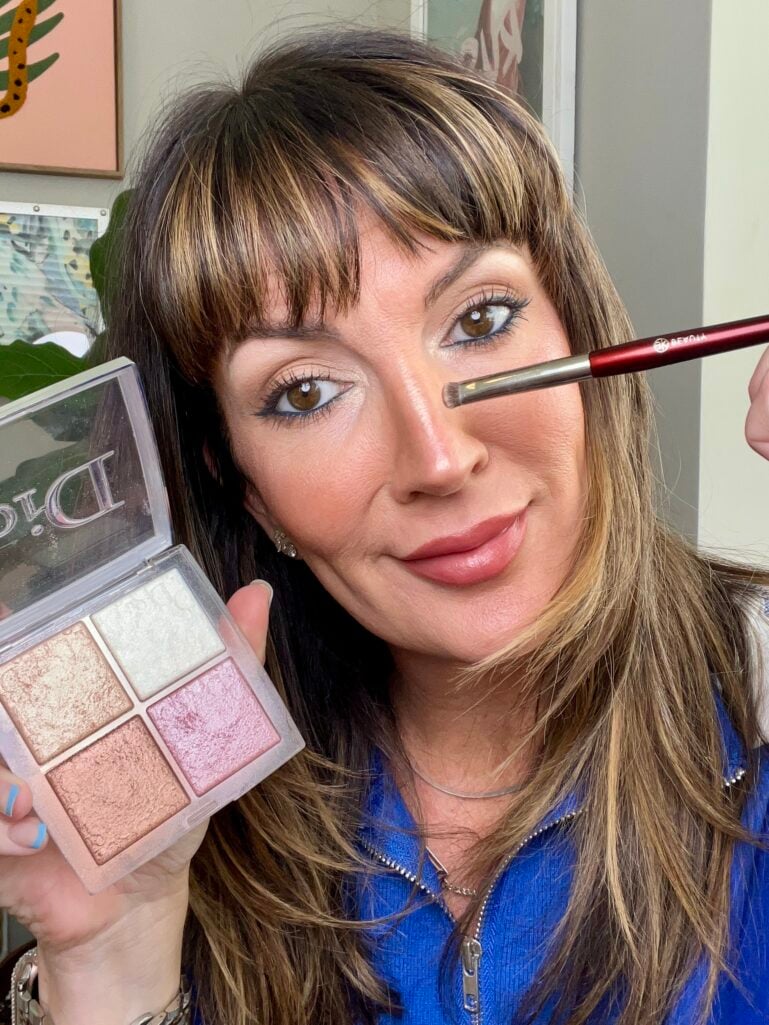
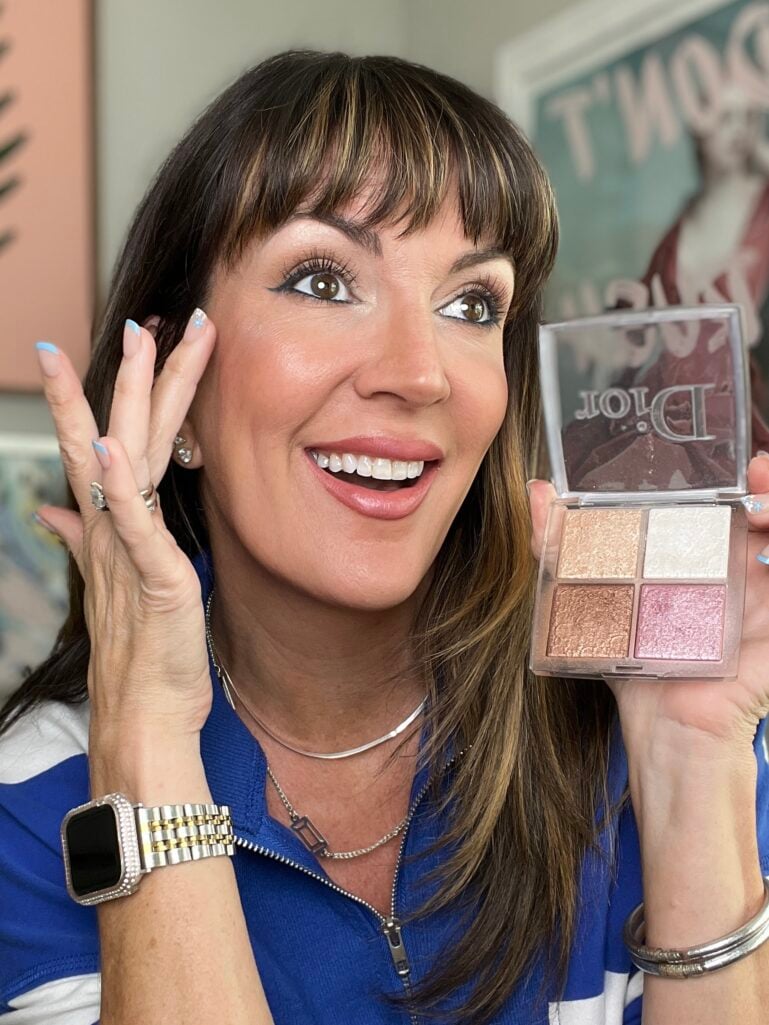
Dior Backstage Glow Palette, 001 Universal, $48. *What I’ll be using in today’s tutorial * If you’ve read my articles for a while now, this iconic product does not surprise you! I rely on this powder quad so much because of its neutral versatility of the 4 shades offered in one palette. And for Dior quality, this price isn’t terrible in my opinion. I love the shimmer finish that doesn’t read glittery, and you can use them as singles or mix them together to make your perfect shade cocktail. Don’t want the pink so pink? Mix it with a bit of the warm gold! Your combos are endless. This is a MUST have in your makeup arsenal.
NYX Jumbo Multi Use Highlighter Stick, $8,”Coconut Cake” my favorite shade here for most skin tones. This twist up jumbo stick makes highlighting in just the right spots a breeze! And it’s a cheap way to test the waters to see if you even want to continue highlighting before investing in more expensive highlighters.
Tools For Highlighting
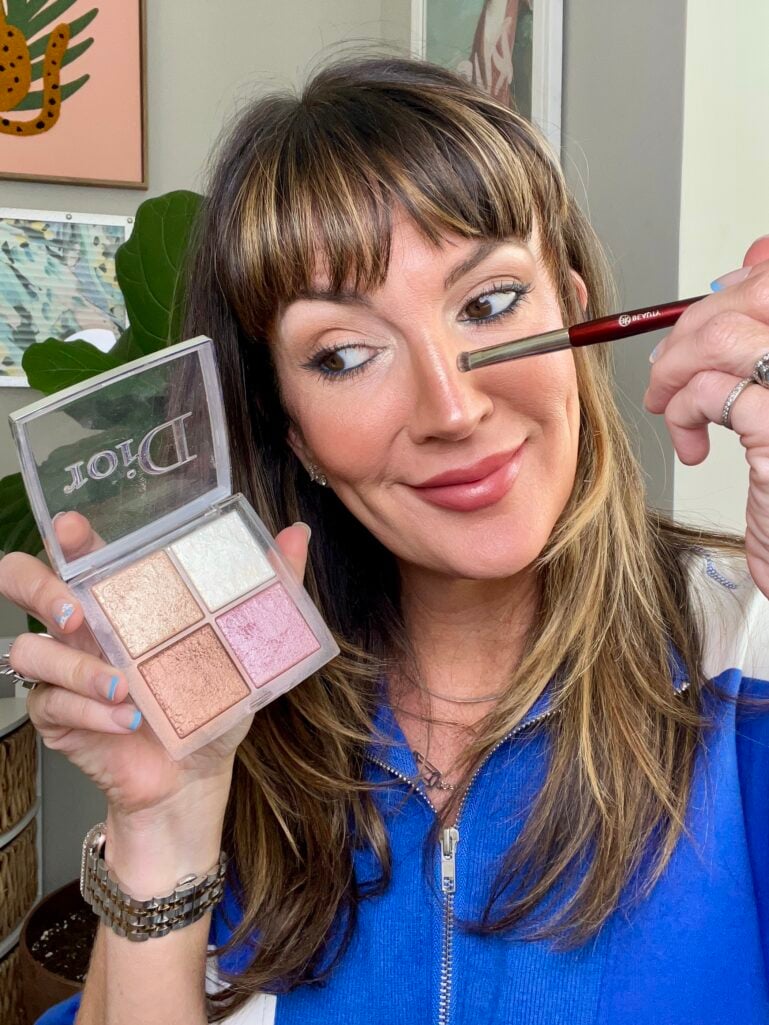
Besides my finger, the brushes I will be using for powder highlighter placement today are actually EYESHADOW brushes! I find the smaller shadow brushes work better for these areas on the face that you want to add minimal shine and have more control over exact placement – unlike with a too large brush that scatters the highlighter.
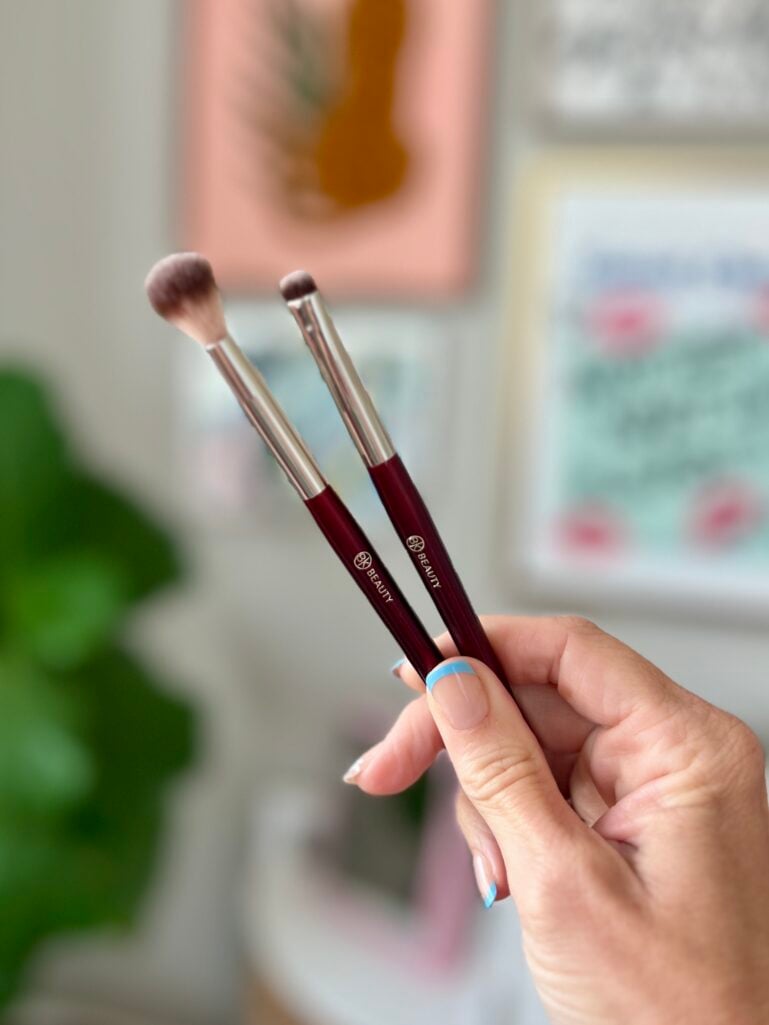
I’ll be using the BK Beauty 201 Blended Crease brush today, $18 for the cheek area and overall softening edges. And for the tiniest areas that you’ll see in the tutorial (like the eye area) this BK Beauty 204 Smudge Brush, $15, has very short stacked bristles for creating distinct fine, yet blurred lines.
Where to Apply Highlighter on a Mature Face
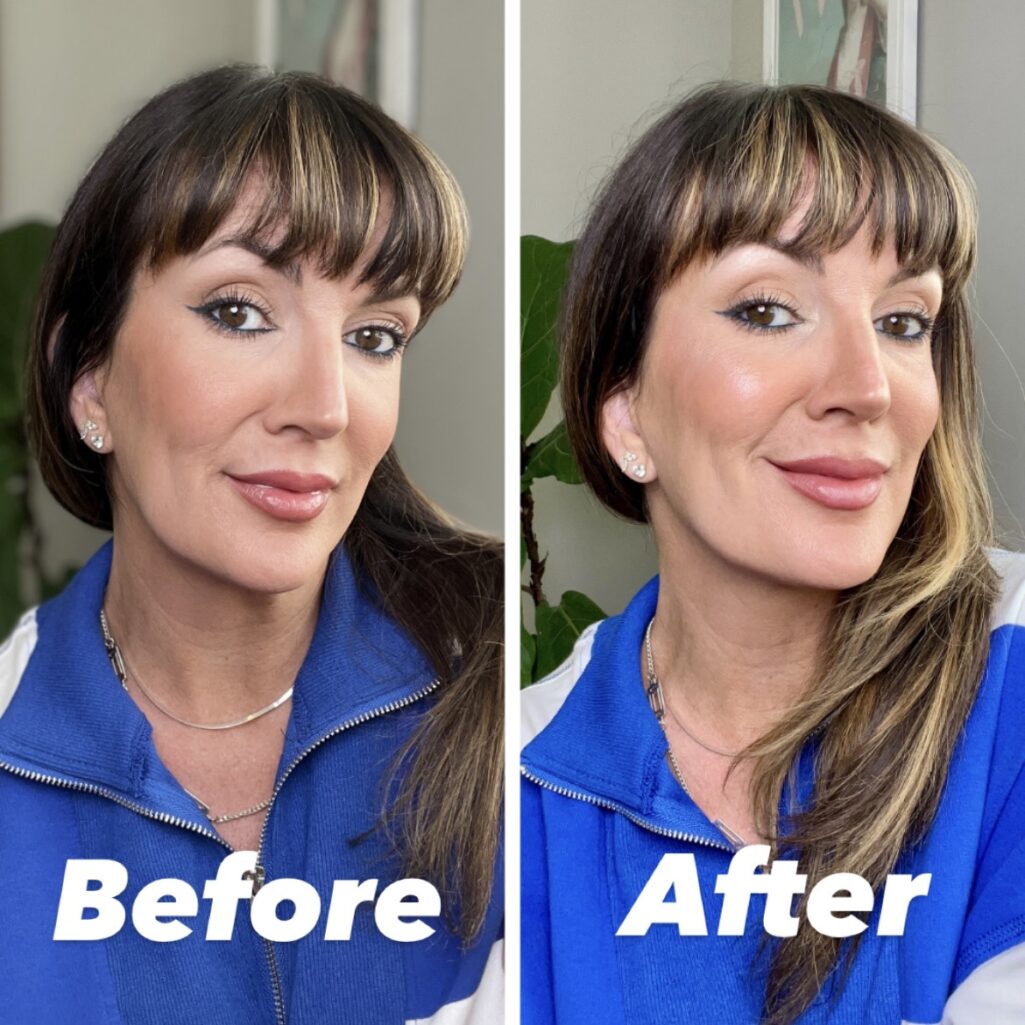
Here are two photos of my face below. The first is my “before” with all matte products applied from my tinted moisturizer, concealer, eyeshadows and blush. The second photo is my “after” which has the highlighter placement in the specific areas I’m about to share. No other corrections or additions have been made except the highlighter.


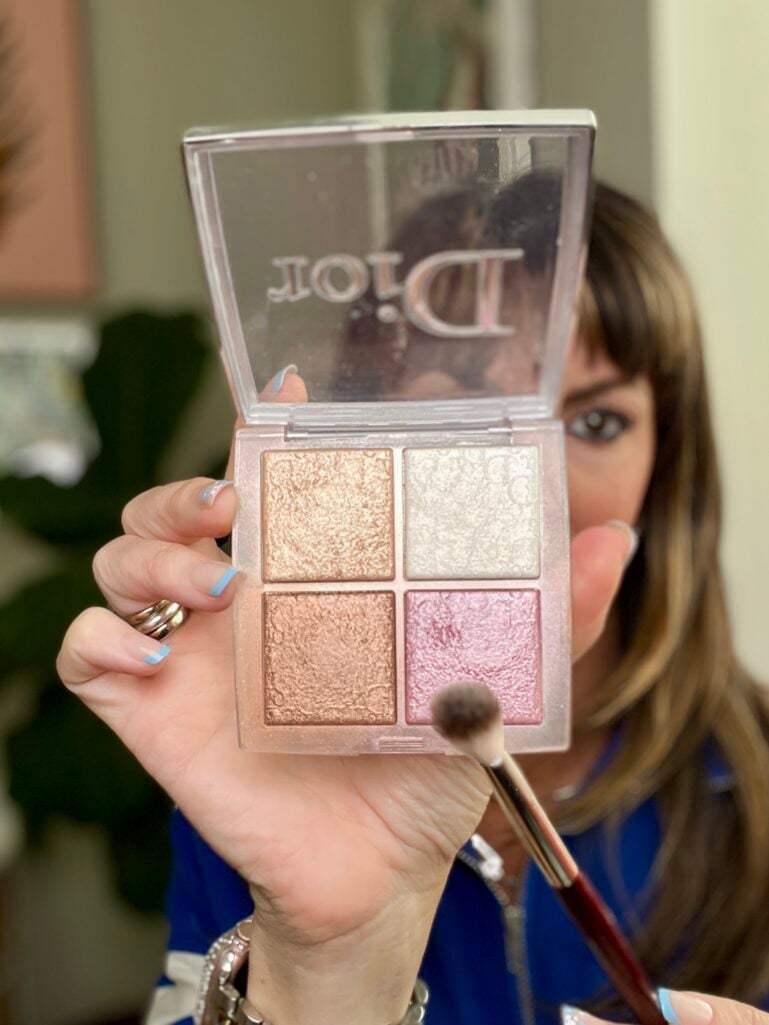
You can see the difference between the two is very subtle, but does make a lovely impact on my originally matte face! Remember, all highlighting was done with this one quad Dior glow palette in shade 001, $48. The four shades included are pink, white, champagne, and bronze.
- High points of the cheeks – Lightly sweep highlighter in a small crescent moon shape on the very tops of your cheekbones to lift and give a fuller appearance to your cheeks. My face has narrowed and cheeks have sunken in with aging, so this brings some pop to that area. I used the pink shade here.
2. Under the brow bone – Subtle sheen here just directly under your arch, NOT all the way across the brows. This can give the eye a lifted appearance (no surgery required). I used the white shade here.
3. Inner corners of the eyes – Follow along the tear duct area with highlighter to brighten and open the eyes tremendously. This is an underused area for all ages and makes such a positive difference in the eye area. I used a mix of the white + gold shadow for this.
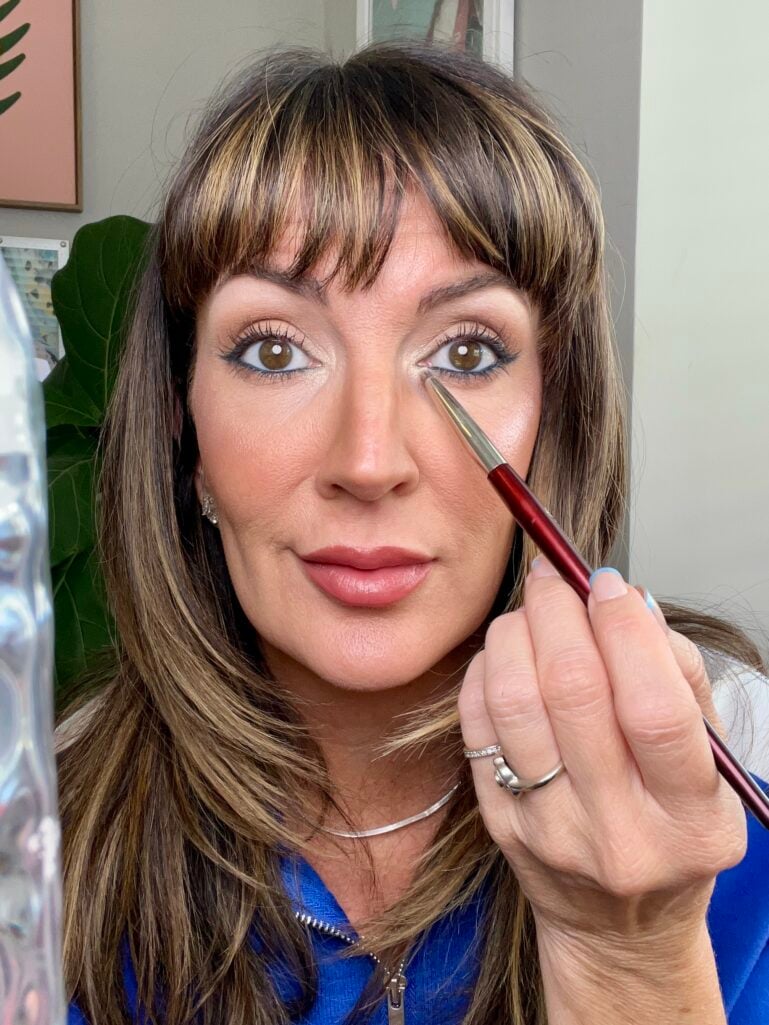
4. Bridge of the nose (+ tip if so desired) – This adds a touch of structure to the nose. For the bridge area, just a small line right in the center of the nose – do NOT extend all the way to the tip. Leave a matte space in between. You can avoid the tip all together if you don’t want to draw attention there if you feel your nose is prominent enough. But I kind of like the pop it brings to create a button type nose. I used the gold shadow for this.
5. Cupid’s bow – A dab above the center of the lip creates a fuller-looking pout, using the bronze + white. I even took my finger and tapped it into the pink highlighter, then patted the pink into just the center of my lower lip on top of my satin lipstick! *My lipstick combo before I added the highlighter is elf cosmetics glide lip liner in “mauve aside,” $2, and Charlotte Tilbury Hot Lips lipstick in “Glowing Jen,” $38.*

AVOID highlighting areas with deeper wrinkles or large pores—we want to reflect light, not magnify texture. This is why choosing the areas that I just showed you – the inner eye, the bone part of the bridge of the nose, etc, are all areas that usually have very little, to no prominent wrinkles!
The Rest of My Look Details
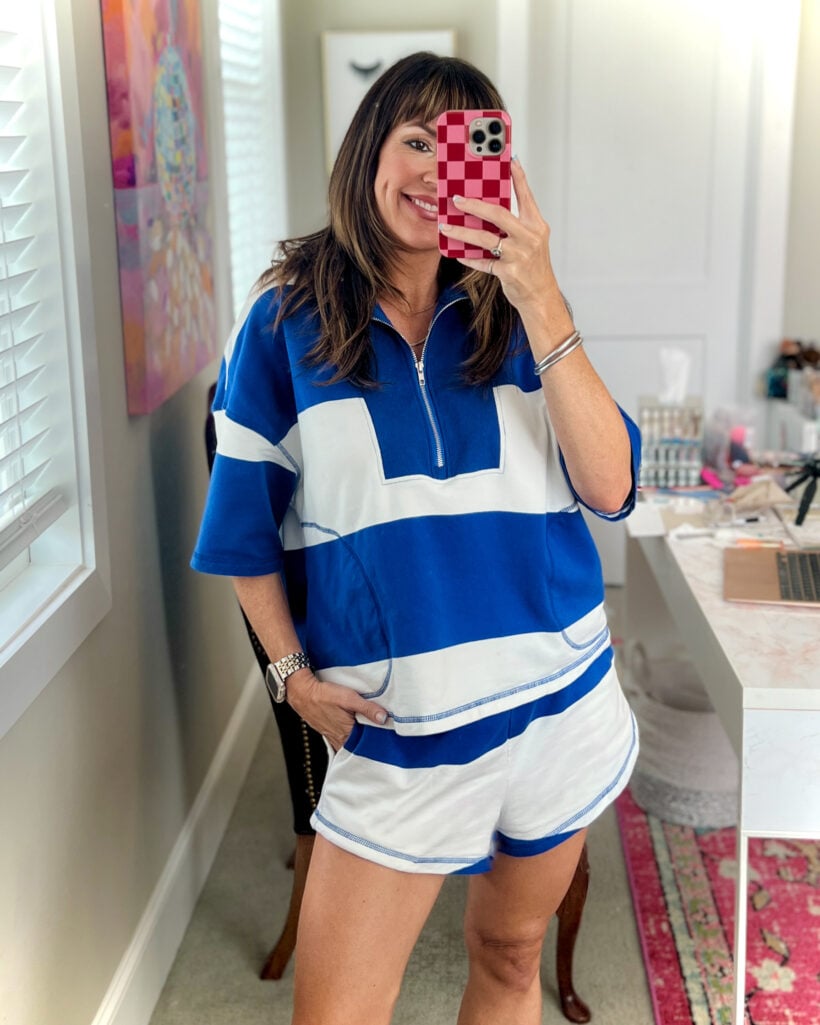
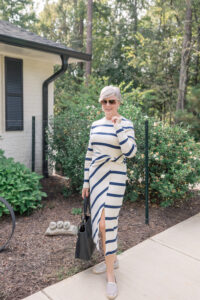
I gave in and bought the viral Amazon two piece striped summer set, $48, here in the blue and white combo. It’s AMAZing. I wear it all the time. The top is oversized with a quarter zip and pockets. And the shorts are on the short side, which I like, and they also have pockets! It’s soft, comfy and comes in a gazillion color combo options. I am a small. // Wearing the Hourglass Hydrating Veil Skin Tint, shade 5, $49, for my base here. // My cheek color is from the Smashbox Halo palette in shade “Back to Cali,” $45. // My silver mirrored sneakers (you can’t see!), $29, I wear constantly to boost the “extra” factor with any casual athletic outfit. // Laura Mercier Caviar tightliner eyeliner in “Bleu Marine” is my shade used today.
Highlighter is not about sparkle—it’s about radiance. It’s the difference between “you look tired” and “you look well-rested.” And no, you don’t HAVE to put highlighter in every single spot I mentioned here – you can pick and choose your comfort glow level! Do the brow bone and cheekbones and go – OR – go for it all! Point is always, you do you.
Just don’t let your age dim your glow. Light it up, lift your features, and wear that highlight like the confident, luminous woman you are my friend.

Hi, I enjoy your makeup ideas each Saturday and would like your opinion on No Make Up Make Up if you don’t mind.
Thanks in advance for this help.
Hey Violet! I actually included a no makeup makeup inspiration tutorial just recently here – will leave the link below for you to check out https://www.styleatacertainage.com/beauty/would-you-go-makeup-free-like-pamela-anderson/
I love this tutorial. I’ve been wondering how to add highlights. Thank you so much.
Yay gladys! So happy this came at the right time for you to learn!
Hi Jennifer! I’m new to using highlighter, but I was playing around one day and discovered that it DOES make a positive difference with or without foundation. I have dark circles under my eyes so when I do “make up” for going out, I use concealer. I use it in the corners of my eyes, too, where you have demonstrated using the highlighter. Should I use both products there? One or the other, and which one? I don’t want to “highlight” that tired look! Thanks!
Hello Glo! I hope I’m answering your question correctly, but I think if you’re using the concealer in the corners of the eyes to brighten, you absolutely could add a touch of highlighter on top of that area as well after you’ve let the concealer set. This is not a super wrinkly area so I think if you use a white or champagne highlighter very sparingly around the tear duct area it will brighten your eyes even further!
Thanks, Jennifer, for another informative beauty lesson. I always look forward to reading your Saturday posts.
I’m also impressed with the photography. You are always able to show the beauty products and procedures on your beautiful face! And … I’m going to try a bit of highlighting!
Why thank you Judy! Glad you took notice of the images I create – I feel like good photography helps with the tutorial for sure and making the techniques and tricks I share seem less complicated when you have good visuals!
Hi Jennifer I love your weekly beauty ideas and do indeed purchase some of your recommendations
Lasts weeks no makeup makeup was fun.
I am 74 and don’t wear a huge amount of makeup but definitely wear makeup. Can you advise on using highlighting for the older face.
Loved this post. TBH, I never knew highlighter could be so versatile. I’m going to try it.
Maybe you can do a tutorial on lip care and lip color. Your lips always look smooth and full. As I get older, my lips get so dry and I don’t want to emphasize that but I love lip color.
You could teach us a bit about the different choices, oils, stains, balms, glosses- oh my! – how they’re different and how each choice works for the look one is going for.
I appreciate you saying so about my lips Susy! And I love getting new post ideas, so thanks for the inspiration! I’ll get to work on a lip post
I have enjoyed all your post especially the ones for mature aged women. I’m in my seventies, you are an inspiration to strive for the best you can be without looking like a caricature of an “older” woman. You have so much class!’
Why thank you Mimi for saying such kind words 🙂 I appreciate it so much and glad you’re enjoying my posts!